![]()
BOOMEA - Phone Page
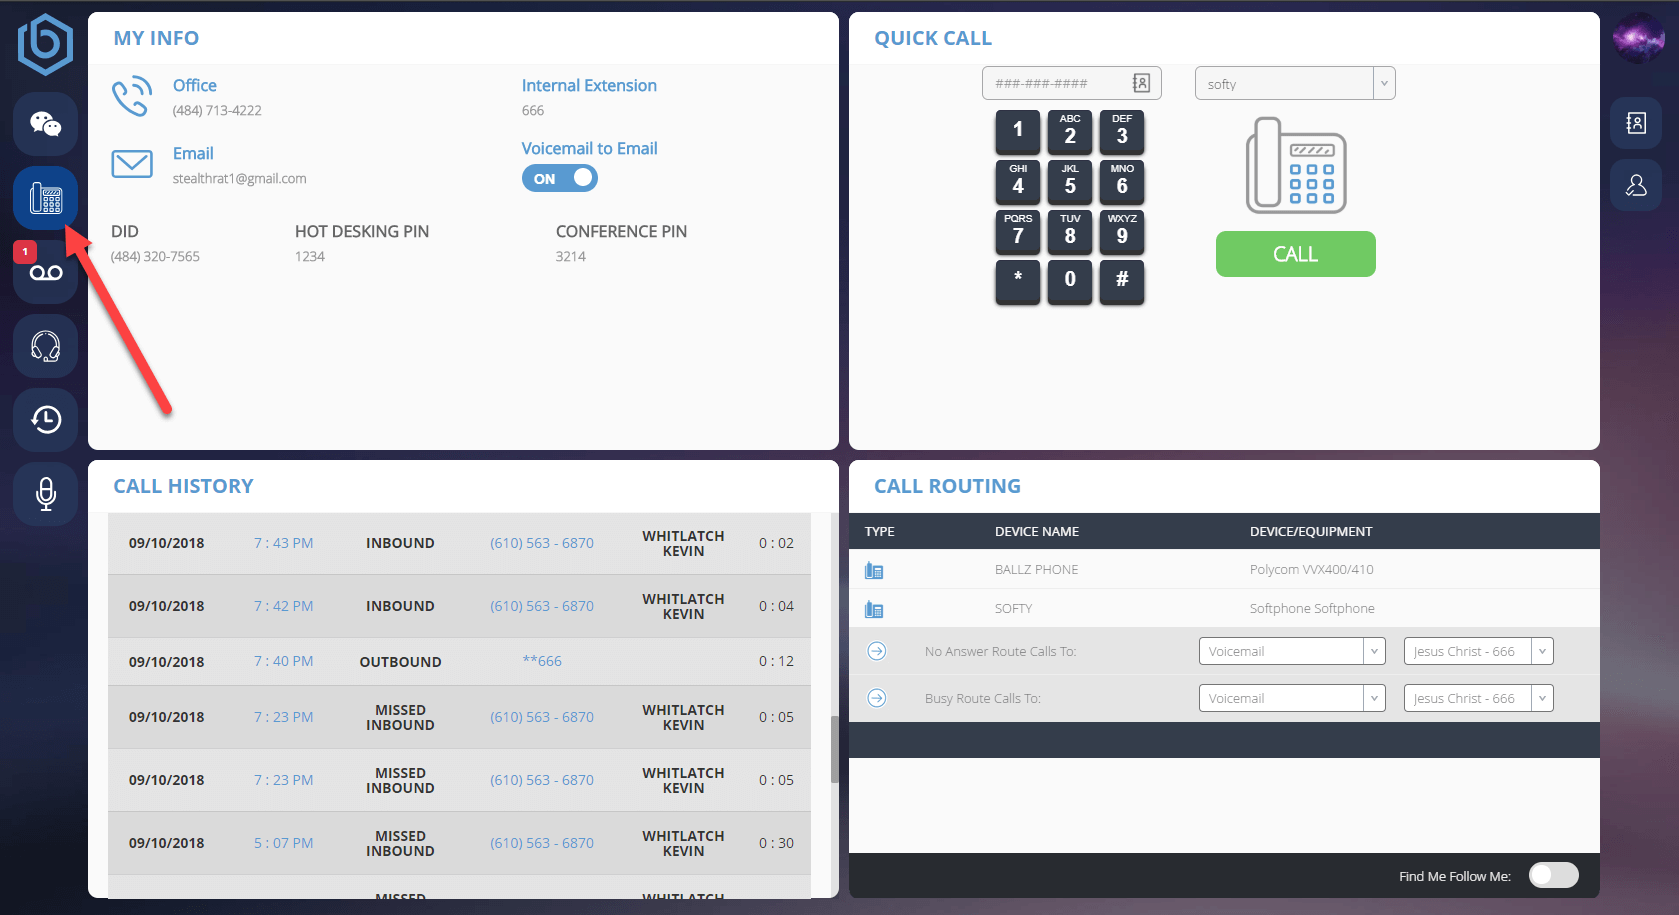
This article is aimed at discussing the Boomea phone page. There are 4 Widgets on the phone page:
1) My Info.
2) Quick Call.
3) Call History.
4) Call Routing.
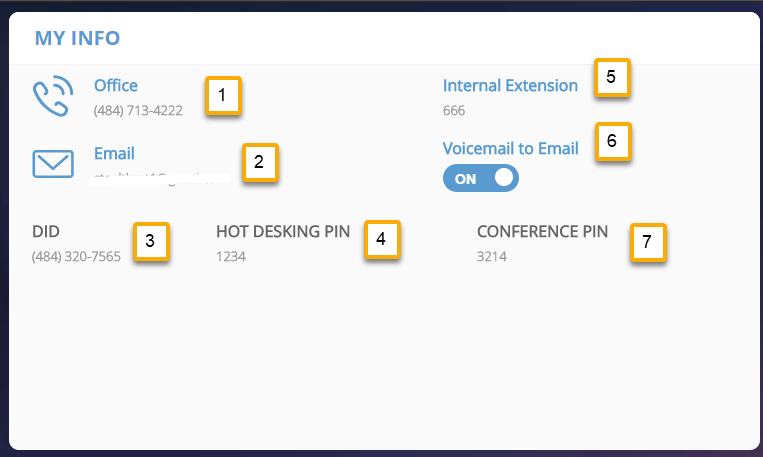
MY INFO
The My Info Widget contains all of your relevant information. These pieces of information are:
- Office.
- This is the outbound caller ID number that you use for your outbound calls.
- Email.
- This is the email address set from your device user page.
- DID.
- This is the number that will ring directly to you (where applicable)
- Hot Desking Pin.
- This field displays the pin you will use to hot desk into other phones if hot desking is enabled for your device user.
- Internal Extension.
- This is your extension number.
- Voicemail to Email.
- This displays if you have voicemail to email on or off.
- Conference Pin
- This will display your conference pin number as long as you have a conference assigned to you.
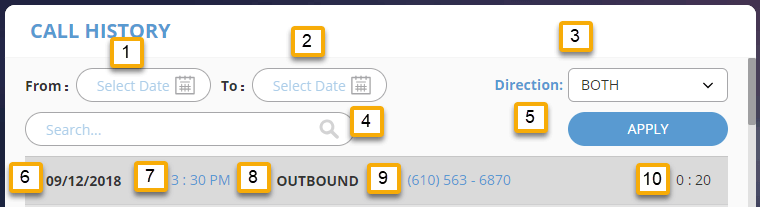
CALL HISTORY
This Call History Widget shows you the call history of your device user with the following information about those calls:
- Start Date.
- This will display a calendar picker and will allow you to select a start date to filter calls by.
- End Date.
- This will display a calendar picker and will allow you to select an end date to filter calls by.
- Call Direction Filter.
- Choose to display inbound calls only, outbound calls only, or both.
- Search Bar.
- Search the call history by caller ID name or number.
- Apply Button
- Hitting this button will apply any filters/dates that you have specified.
- Date.
- Date the call was made/received displayed in MM/DD/YYYY
- Time.
- The time of the call.
- Direction.
- This field displays if the call was inbound or outbound.
- Telephone number
- This field displays the number you dialed or the number that called you depending on the call direction
- If the call was inbound and had a caller ID name, the caller ID name will be displayed after the telephone number
- Call Duration.
- This field will display how long the call lasted.
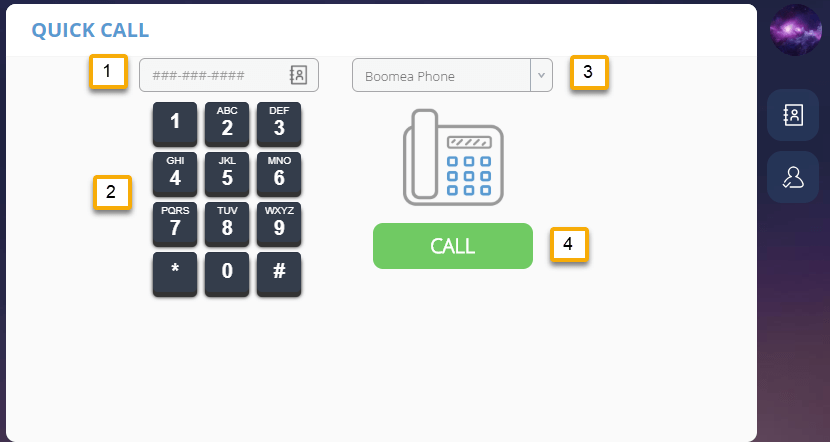
QUICK CALL
The Quick Call Widget allows you to easily initiate a call. Using the quick call will initiate a call to your specified device; picking up that call will then initiate a call to the number you placed in the number box.
- Number Box
- You can input the number or user extension that you want to call.
- Dial Pad
- Dial the number or user extension that you want to call.
- Phone Select Dropdown
- This dropdown box will allow you to select which one of your device will be used to make the call.
- Call Button
- Hitting this button will initiate the call.
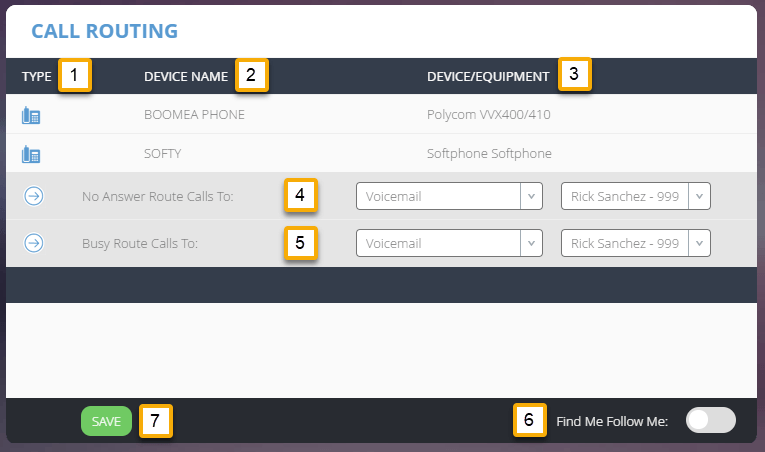
CALL ROUTING
The Call Routing Widget will show you all of your device user call routing settings. From here you can change where calls go, how long they ring for, setup a time of day, etc.
- Type.
- This is the type of phone (VoIP Phone, Outside Phone, Fax Device, Mobile App, etc).
- Device Name.
- This is the name of your device.
- Device/Equipment.
- This is an informational field that will tell you what your devices manufacturer and models are.
- No Answer Route Calls To.
- This is where calls will go if you do not answer them.
- Busy Route Calls To.
- This is where calls will go if you are busy and unable to answer the incoming call.
- Find Me Follow Me.
- This is a toggle that will change the page if enabled. See below.
- Save Button
- Pressing this button will change your settings.
- Pressing this button will change your settings.
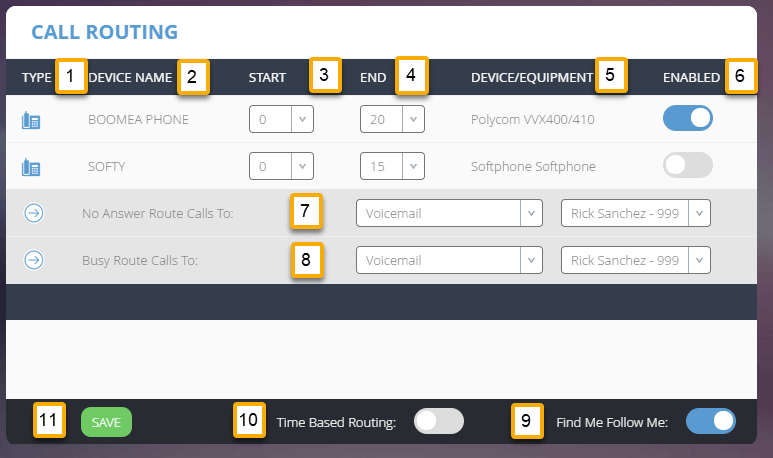
FIND ME FOLLOW ME SETTINGS
Find Me Follow is an advanced feature that allows a user to take control over how a call comes into them. With Find Me Follow Me (FMFM) enabled, a user can decide which devices ring, how long per device, and in what order. This allows you, for example, to have one device ring for 20 seconds, and then have your cell phone ring after the first phone is done for another 20 seconds. Turning on FMFM me will change the settings that you see on the call routing page. Below you will see the difference in the page.
- Device Type.
- This will be a VoIP phone, outside line, or fax device.
- Device Name.
- This is the name of the devices that are assigned to you.
- Start Time
- This is when to begin ringing a device.
- In the below screenshot the first device will ring from 0-20 seconds.
- This is when to begin ringing a device.
- End Time
- This is when the device will stop ringing.
- In the below screenshot the first device will ring from 0-20 seconds.
- This is when the device will stop ringing.
- Equipment.
- This is an informational field that will display the device model and manufacturer.
- Enabled.
- This is a toggle that will determine if a device is set to ring at all.
- No Answer Route Calls To.
- This is where a call will go if you do not answer it on any device.
- Busy Route Calls To.
- This is where a call will go if you are busy and unable to answer the call on any device
- Find Me Follow Me
- This is a toggle that will turn FMFM off or on.
- Time Based Routing.
- This gives you the option to set a timeframe on when you can and cannot be reached.
- Save Button.
- Clicking this button will save your settings.
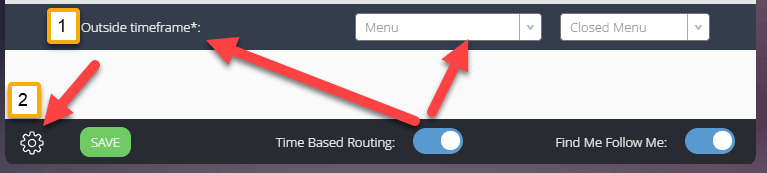
TIME BASED ROUTING
Time Based Routing is part of FMFM. Turning on FMFM not only changes the settings on the page, but also unhides the time based routing toggle. Turning this on will unhide two other fields called "Outside Timeframe" and the gear icon. Below is a screen shot and description of how to use time based routing.
- As you can see in the screenshot, turning on Time Based Routing displays an outside timeframe option. This field will be used if a call comes in during your after hours.
- Turning on Time Based Routing also unhides the gear icon. Clicking the gear will take you to the Time Based Routing page.
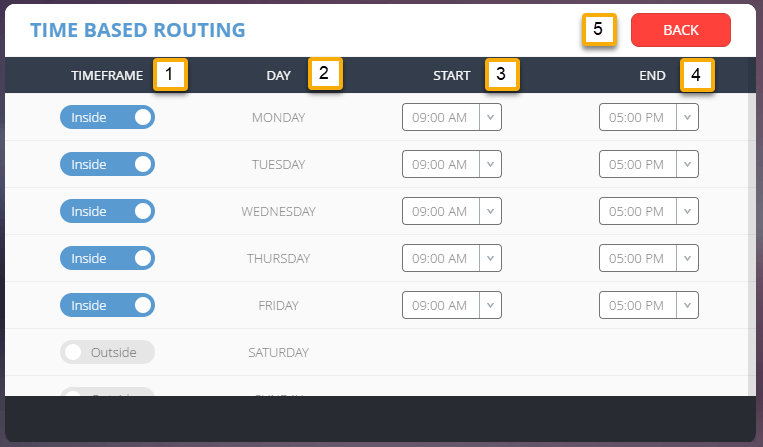
SETTINGS GEAR ICON
Clicking the gear icon will take you to the page below. Here you have a few fields and options. They are:
- Timeframe
- Choose what day will be inside or outside of the timeframe.
- Day.
- Day of the week.
- Start
- This is the start time for your hours during a specific day.
- End.
- This is the end time for your hours during a specific day.
- Back Button.
- Clicking this will take you back to the phone page.
For more information on how to setup and understand a time of day routing table, please view the video titled "Add Time of Day" located in the video section of the university.
Need Help?
Contact our Sneaker Phone Agent.
They'll get back with you shortly with an answer.
 Red Sneakers Works!
Exactly what does Red Sneakers do? Simple.
We help our clients make money. That's not an accident, it is by design.
Our background is sales and marketing, our format is technology. We have mobile tools that will help you make more money AND we will teach you how to use them. Or, we'll do it for you. We make one promise. When you use SEO Skybox Suite or any of mobile marketing tools...
You will make more money.
-- Ed Moore, SEO Coach
Red Sneakers Works!